
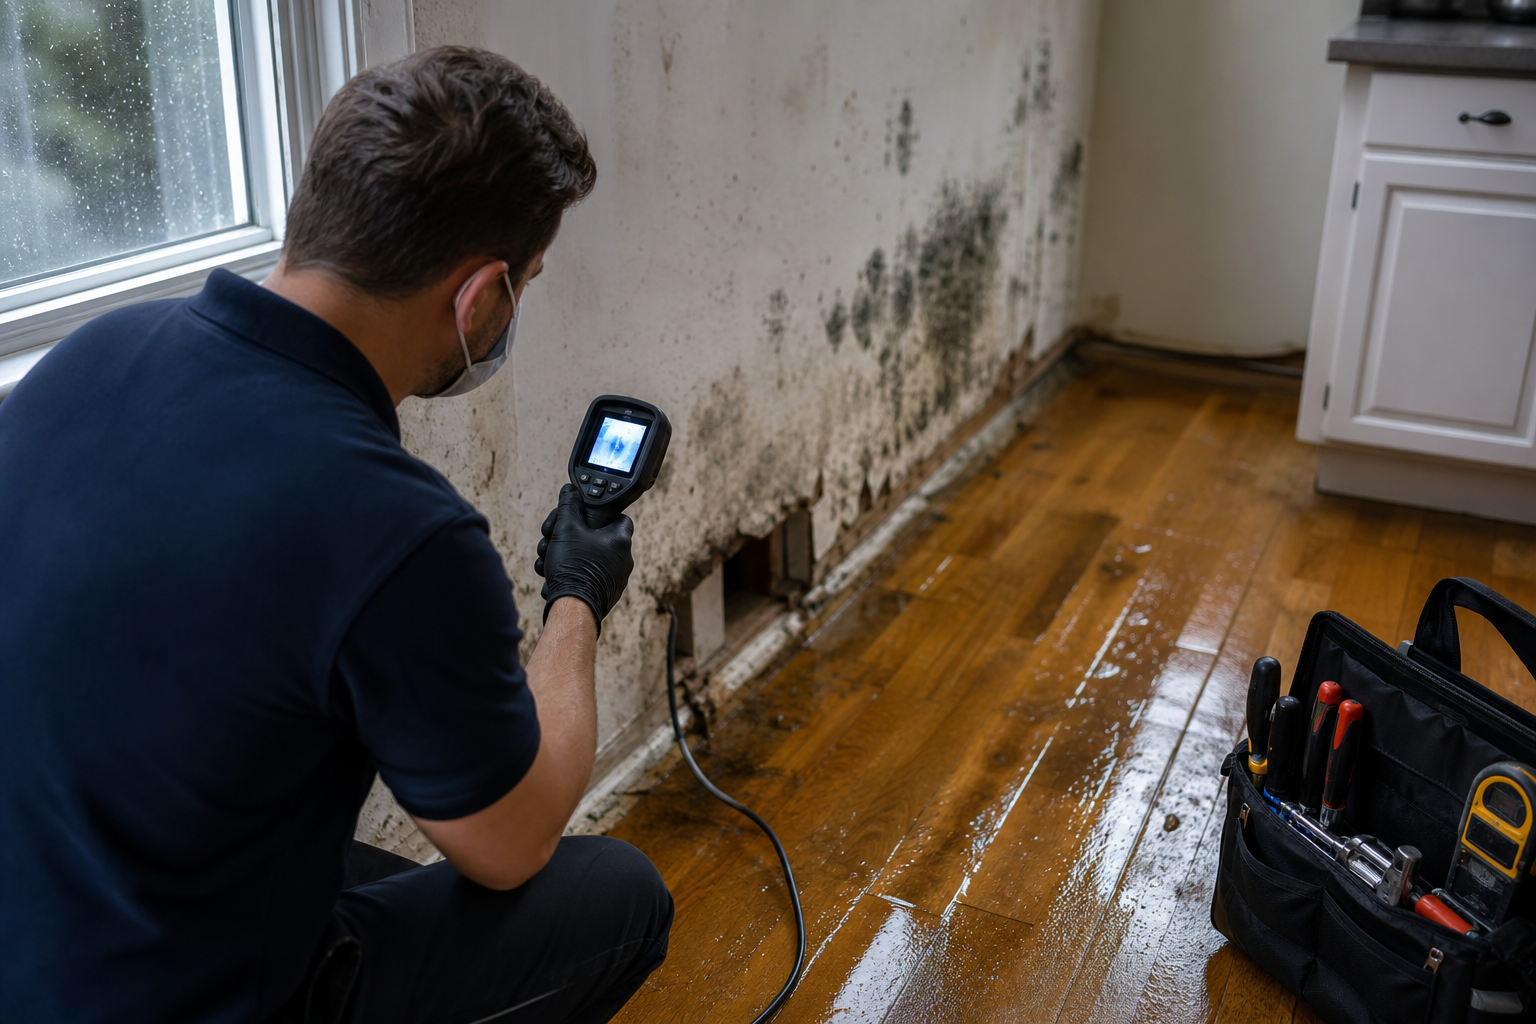
What leak detection for mold prevention means and why it matters
"Leak detection for mold prevention" is the deliberate process of finding hidden water entry, plumbing faults, or moisture sources before mold grows or spreads. Hidden leaks allow materials to remain wet long enough for mold to develop, which creates health concerns and structural damage and can complicate home sales and insurance claims. For practical prevention steps and an assessment approach consult Health Canada’s guidance on addressing moisture and mould indoors (addressing moisture mould your home.html).
How leaks lead to mold
Water from roof leaks, plumbing failures, appliance hoses, or condensation raises material moisture and indoor relative humidity. If wet materials are not dried quickly, spores on surfaces begin to grow. The risk is highest in concealed areas such as attics, wall cavities, and crawl spaces where leaks go unnoticed and ventilation is poor.
Why early detection saves money and risk
Finding leaks early reduces the area that needs drying or removal, stops ongoing water damage, and lowers the chance of costly remediation. For homeowners and real estate stakeholders, documented detection and rapid mitigation add confidence in transactions and may be required to support remediation claims or warranties.
A 6-step decision checklist you can use now
Use this ordered checklist for a quick triage. Each step lists recommended tools and red-line triggers that should move you to professional leak detection.
1) Quick visual scan
- Action: Inspect visible surfaces for water stains, peeling paint, bubbling plaster, or visible mold colonies. Smell for persistent musty odours.
- Tools: Flashlight, camera or phone for date-stamped photos.
- Red-line trigger: Any visible mold patch larger than a few square centimetres, continuous staining, or an unexplained musty smell. Call a professional.
2) Measure humidity and temperature
- Action: Place a hygrometer in the affected zone for at least 24 hours to check relative humidity and daily fluctuations.
- Tools: Basic hygrometer and notebook or smartphone for readings.
- Red-line trigger: Consistently high relative humidity or readings above about 50 percent suggest conditions supportive of mold and require investigation. Authoritative prevention checklists recommend monitoring indoor humidity and improving ventilation where needed (Verified Remediation).
3) Search likely leak sources
- Action: Look above and around stains for roof flashings, plumbing and appliance fixtures, furnace and HVAC drain lines, and attic ventilation gaps.
- Tools: Ladder, binoculars for attic inspection, and a bright inspection light.
- Red-line trigger: Active dripping, water pooling, or repeated stains that return after drying. Arrange professional leak detection now.
4) Immediate drying and isolation
- Action: Remove wet contents to dry areas, increase airflow, and use fans or dehumidifiers to speed evaporation.
- Tools: Fans, dehumidifier, absorbent towels, plastic sheeting for containment, and garbage bags for unsalvageable items.
- Red-line trigger: If you cannot dry the area within the recommended timeframe, seek professional drying and moisture assessment. Industry guidance advises drying wet areas within about 24 to 48 hours to reduce the chance of mold starting (HomeSaver).
5) Document conditions
- Action: Photograph stains, odour sources, hygrometer or moisture meter readings, and the suspected source before moving or repairing materials.
- Tools: Camera, notebook, date-stamped photos or video, and a simple log of readings and times.
- Why: Documentation supports insurance claims, real estate disclosures, and helps contractors scope work accurately.
6) Decide DIY or call a pro
- Action: Use the decision criteria in the next section to choose the next step. If in doubt, call a certified provider for an inspection and moisture assessment.
- Tools: This checklist and contact details for remediation specialists who offer same-day assessments when needed.
- Red-line trigger: Any unanswered source, health symptoms among occupants, large or concealed wet areas, or if you need formal documentation for a sale or insurance claim.
Five red flags that mean call a professional leak detector now
These urgent signs usually warrant professional detection and immediate mitigation.
1) Visible mold spread or rapidly growing colonies
If mold appears to increase in size over days, the underlying moisture is active. Professionals use targeted investigations to find hidden leaks before remediation.
2) Repeated stains or active dripping
Recurring ceiling or wall stains that return after repairs point to an unresolved source in the roof, plumbing, or within wall cavities. Call a professional to locate and stop the leak.
3) Persistent musty odour with no obvious source
Odour can signal hidden mold in inaccessible cavities, attics, or ducts. Professionals combine moisture assessment and targeted air testing when odours suggest concealed growth.
4) High humidity and condensation despite ventilation
When hygrometer readings remain high and condensation forms on windows or pipes, condensation or plumbing faults may be the cause. Persistent high humidity should prompt a professional moisture assessment.
5) Water in concealed spaces such as attics, crawl spaces, or inside walls
Water trapped in these areas often causes hidden damage. Specialists use thermal imaging, probes, and video inspection to locate leaks with minimal demolition.
Professional leak detection methods: what they are and what they find
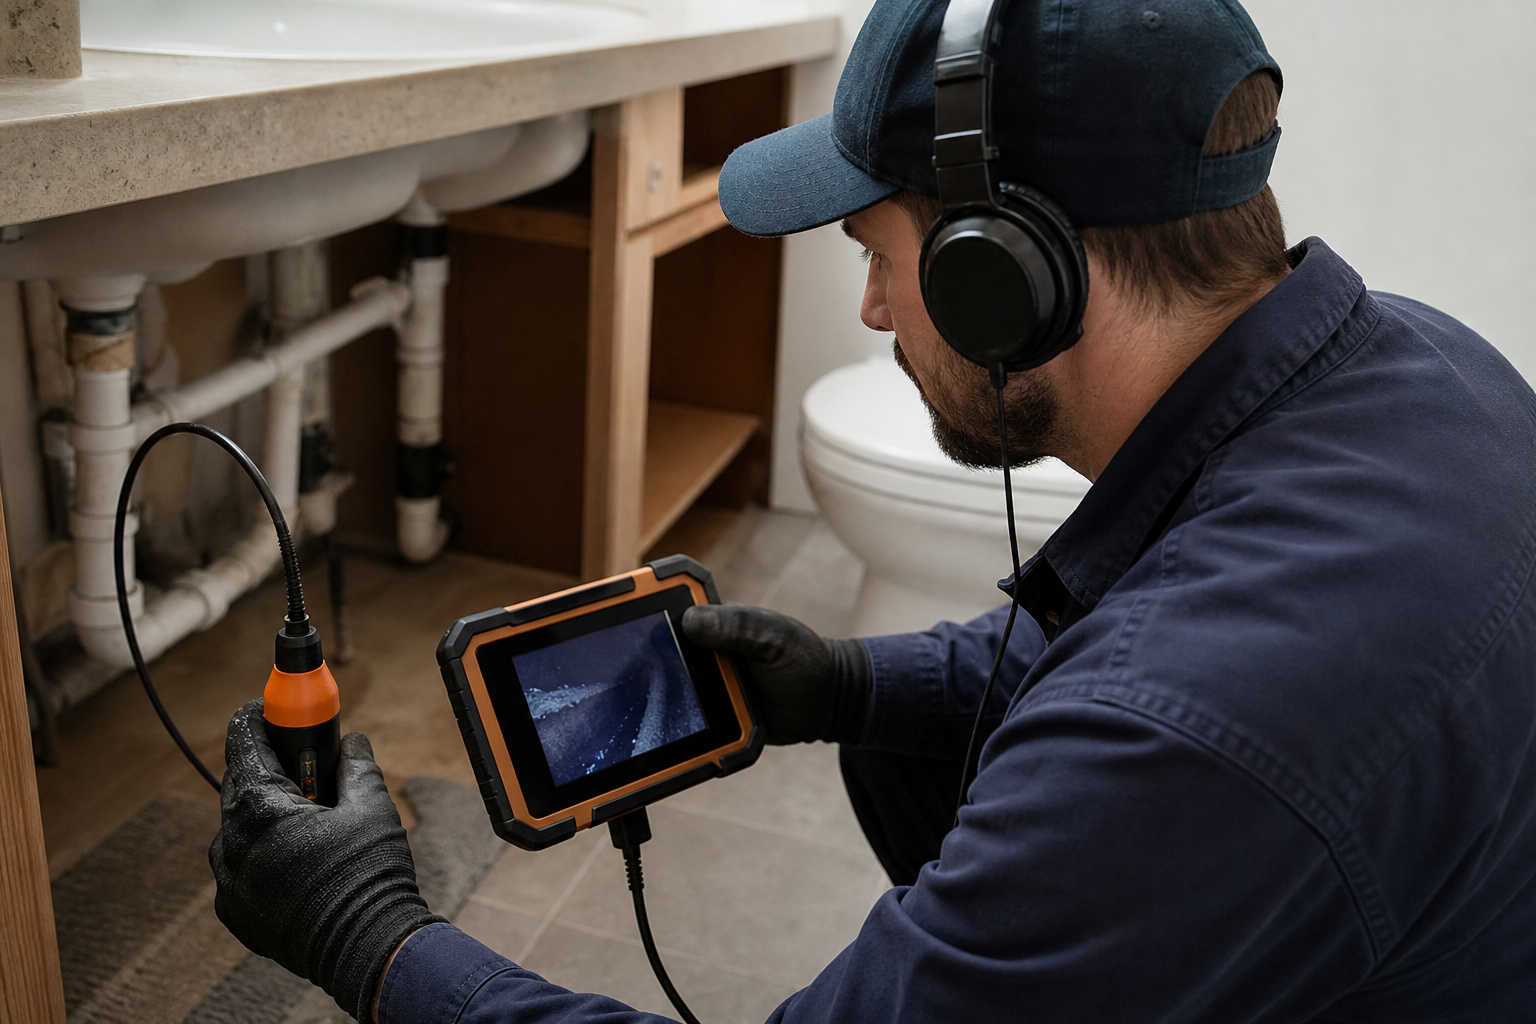
Understanding methods helps you evaluate contractor reports and decide which tests you need. Expect an interpretive report that includes annotated images, meter readings, photos, and recommended next steps.
Thermal imaging
Thermal cameras highlight temperature differences that reveal wet framing or insulation as cooler areas. Thermal imaging is fast and noninvasive and is helpful for attics and wall scans, but it cannot give moisture percentages or identify the exact leak path on its own. Use thermal imaging alongside moisture meters and probes. For details about inspection and diagnostic practice see Asmmoldremoval’s service overview (Asmmoldremoval).
Moisture meters and probes
Pin and pinless meters measure moisture in wood and building materials and report a percentage or relative reading. They confirm whether materials are above safe drying thresholds and help verify drying after mitigation.
Hygrometers and data logging
Portable or data-logging hygrometers record relative humidity over time so professionals can distinguish temporary spikes from sustained high-humidity conditions that support mold growth.
Targeted air and surface testing
Air or surface sampling is used when the cause of symptoms or odour is unclear, or for documentation in transactions. Testing can show spore types and relative counts but must be interpreted together with inspection findings.
Video inspection and tracer tests
Cameras down drains, tracer dye, or pressure testing help confirm plumbing leaks inside walls or below slabs. These tools isolate the failure without removing large sections of finish.
Interim actions to limit mold growth while you wait
If you suspect a leak take these safety-conscious steps immediately while awaiting professional help.
- Stop the source if it is safe to do so. Shut off the water supply to an appliance or the main if a pipe is leaking and you can access the shutoff valve.
- Isolate the affected area. Close doors to reduce spread and place clean plastic under wet items if possible.
- Remove and dry personal items. Move furniture and fabrics to a dry, ventilated area to prevent secondary damage.
- Increase airflow and dehumidify. Use fans and a dehumidifier but avoid direct high heat that can trap moisture in materials.
- Do not seal or paint over wet materials. Do not use bleach on porous materials as it may not stop growth and can damage surfaces.
- Vacate areas if occupants experience significant respiratory symptoms until the area is controlled.
Industry guidance recommends drying wet areas quickly, generally within 24 to 48 hours after exposure to reduce the chance of mold starting, so act promptly while arranging professional drying if needed.
Decision criteria: when to handle it yourself and when to hire a pro
Use these practical thresholds to decide.
- DIY acceptable: Small, localized leaks under 1 square metre, accessible materials that can be fully removed and dried within 24 to 48 hours, and no occupant health vulnerabilities.
- Hire a pro: Unknown source, repeated or ongoing leaks, visible mold larger than a small patch, contaminated HVAC or ductwork, wet materials inside wall cavities or attic insulation, or when you need formal documentation for insurance or a sale.
When hiring a contractor, request a written scope of work, an interpretive moisture report with annotated images and meter readings, before and after photos, details of containment and drying methods, proof of insurance, and a Mold Remediation Warranty Certificate upon completion if remediation is performed. These deliverables make bids comparable and reduce the risk of unnecessary upsells.
Common objections and what to expect on cost, disruption, and upselling

Cost is often the main barrier. Compare the immediate expense of professional detection and remediation to the longer term cost of structural repair and repeated treatments when leaks are not found. Reputable companies can phase work to limit disruption and use containment to keep areas operational. To avoid unnecessary work require a written quote and a clear scope of services that lists mandatory steps and optional extras. Reliable providers will provide documentation and a warranty certificate after work is completed.
Ontario and real estate considerations: next steps and documentation
For buyers, sellers, and property managers in Ontario documented moisture assessments and rapid mitigation reduce transaction risk. If an active leak or mold is discovered arrange same-day assessment when possible and retain the inspection report and remediation warranty for disclosure. Health Canada’s guidance helps stakeholders understand risk and appropriate responses (addressing moisture mould your home.html).
If you need fast professional assessment, same-day emergency response, or formal moisture assessments with remediation warranty documentation, contact a remediation specialist such as Asmmoldremoval (the official website).
Frequently asked questions
How quickly can mold start after a leak and what can I do in the first 24 to 48 hours?
Mold can begin to grow on wet materials within about 24 to 48 hours if moisture remains. Remove wet materials where possible, increase airflow, use fans and a dehumidifier, and document conditions with photos and meter or hygrometer readings while arranging professional drying if you cannot fully dry the area yourself. See drying and prevention guidance for homeowners (HomeSaver).
Can a home hygrometer or moisture meter tell me whether I need professional leak detection?
Hygrometers and moisture meters are useful screening tools. A hygrometer shows if humidity is persistently high, and a moisture meter gives relative readings for materials. If readings stay high, if readings are inconsistent with visible conditions, or if moisture is detected in concealed materials, professional leak detection is recommended.
What questions and documents should I request from a leak-detection or remediation contractor?
Request a written scope of work, an interpretive report with annotated images and meter readings, before and after photos, details of containment and drying methods, the specific products to be used, proof of insurance, and a Mold Remediation Warranty Certificate when remediation is finished. These items provide documentation for insurance and real estate needs.
Will my homeowner insurance usually cover leak detection and mold remediation?
Insurance coverage varies by policy and by the cause of the damage. Document the leak and mitigation efforts and contact your insurer early. Do not assume coverage without confirmation from your insurer.
When is thermal imaging necessary and what can it not show?
Thermal imaging is useful when you need a noninvasive scan for hidden wet framing or insulation, especially in attics and walls. It cannot measure moisture percentage or locate the exact plumbing path of a leak on its own, so it is normally used alongside moisture meters and targeted probes.
For a fast professional inspection, same-day emergency response, and certified moisture assessments with remediation warranty documentation, contact Asmmoldremoval at the official website.


